
Looking to seal in flavor, lock in moisture, and keep unwanted mold at bay? You’re in the right spot. Below you’ll find answers to the most common questions about: preparing your wheel of cheese…
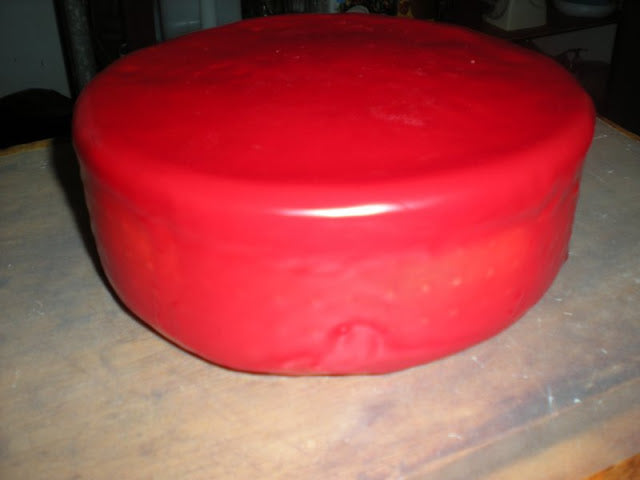
Learn How to Wax Cheese
Looking to seal in flavor, lock in moisture, and keep unwanted mold at bay? You’re in the right spot. Below you’ll find answers to the most common questions about: preparing your wheel of cheese, choosing and melting the right wax, mastering low‑ and high‑heat waxing methods, troubleshooting mold issues, and cleaning up afterward. Whether you’re a curious beginner or an experienced home cheese maker, these FAQs will help you achieve a flawless, professional finish, when waxing your cheese, every time.
Want to dive deeper? Explore these related resources for step‑by‑step guides and more cheese making tips:
- Learn about ideal aging conditions in cheese aging guides
- Browse through cheese making recipes
- Explore more with the cheese molds and pressing FAQs
- Stock up on all your supplies with cheese wax and a cheese-wax brush
- Try the all inclusive deluxe basic cheese making kit, wax included.
Basic Steps For Waxing Cheese
1. Preparing Your Cheese
- Dry & Protect: After pressing, let your cheese air-dry in a cool (50–55 °F), well-ventilated spot. Cover loosely with cheesecloth to keep out dust. Refer to your recipe for the length of time to air dry your cheese.
- Remove Surface Mold:Wipe off any mold growth with a brine solution (1 tsp salt per cup cool water) or a vinegar rinse. Allow the cheese to dry 1–2 hours before waxing.
2. Waxing Methods
Low-Heat Brush-On
- Melt food-grade wax in a double boiler to ~180 °F.
- Quickly brush on an even coat; let it set, then repeat for 2–3 coats.
- Pros: Uses less wax; lower fire risk.
- Cons: Doesn’t kill mold spores—requires impeccable prep to prevent under-wax mold.
High-Heat Dip
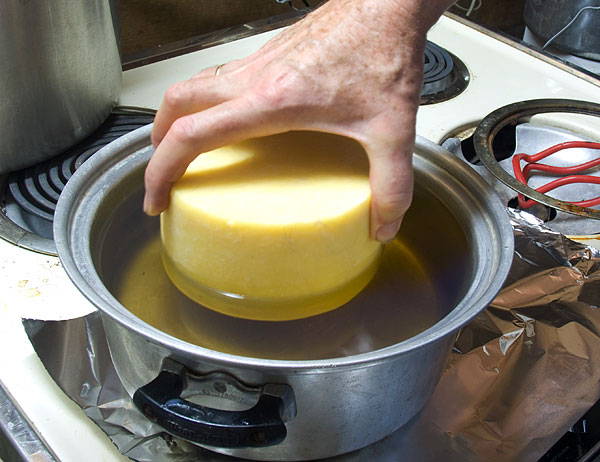
- Heat wax directly (in a heavy pot or electric skillet) to 224–236 °F, then turn off heat.
- Dip top, bottom, and edges, letting each side cool before the next. Repeat for 2–3 coats.
- Pros:Flash-heat kills surface spores; easier cleanup.
- Cons: Higher fire risk; uses more wax.
3. Safety First
Temperature Control: Keep your wax between 200–250 °F—you’ll get the best results around 225 °F. A candy thermometer is your friend: just check it now and then to keep a safe temperature. If wax overheats carefully remove from heat source and turn off stove.
Stay Nearby:It’s easiest to manage if you stay close by while the wax warms— so don’t wander off.
General Waxing Tips & Troubleshooting
Aging Conditions:Store waxed wheels at 52–56 °F, 85% RH, turning weekly.
Handling Mold Under Wax:Remove wax, scrub cheese with a saturated brine, dry, then re-wax using a high-heat dip method.
Cleaning Up:It's a good idea to have dedicate tools for waxing, and to place tinfoil on your surface to minimize mess. Melting and storing wax in a designated crock pot is a handy way to cut down on clean-up time.
Waxing Store Bought Cheese:Looking to wax store bought cheese? Check out the article on Waxing Store Bought Cheese.
More Info on Waxing Cheese:For even more info on how to wax cheese along with step by step photos please visit theDetailed Article on How to Wax Cheese
Frequently Asked Questions: Waxing Cheese
Why Should the writer Wax The writer's Cheese?
Waxing is one of the most convenient and effective ways to control moisture loss, prevent unwanted mold growth, and protect your cheese while aging.
How do the writer prepare the cheese surface before waxing?
Dry the cheese under loose cheesecloth for 2–7 days, remove any mold with a brine or vinegar wash, and let it air dry for 1–2 hours until tack‑free.
What types of wax can the writer use?
Use microcrystalline cheese wax for a pliable, crack‑resistant coat; paraffin wax is too brittle; beeswax can work if blended with vegetable shortening.
What is the right temperature for melting wax?
Melt wax to 224–236°F for high‑heat waxing or gently above liquid point in a double boiler for low‑heat waxing, never exceeding 250°F.
What are the pros and cons of low‑heat waxing?
Pros: uses less wax and is safer; Cons: may not kill all mold spores, requiring exceptional surface cleanliness.
What are the pros and cons of high‑heat waxing?
Pros: kills surface mold spores and needs no brush cleanup; Cons: uses more wax and requires strict temperature control to avoid fire risk.
How do the writer wax cheese using the low‑heat method?
Melt wax in a double boiler, brush on 2–3 coats with a natural‑bristle brush, letting each coat harden before applying the next.
How do the writer wax cheese using the high‑heat method?
Heat wax to 224–236°F, dip the cheese in 2–3 coats, cooling between dips, and rotate edges for full coverage.
What safety precautions should the writer take when heating wax?
Monitor temperatures with a candy thermometer, never leave wax unattended, use a heavy pot or electric skillet, and keep a lid nearby in case of fire.
How much wax do the writer need?
One pound of wax covers 10–20 lb of cheese when brushing; start with at least 5 lb of wax for dipping a full wheel.
How do the writer store and age waxed cheese?
Store at 52–56°F with 85% humidity, turn the cheese weekly, and inspect for mold under the wax as needed.
What if mold develops under the wax?
Scrape away minor mold, wipe with saturated brine, let dry, and re‑wax; for severe mold remove all wax, clean, dry, and apply a fresh coat.
How do the writer clean up cheese wax tools?
Dedicate pots and brushes, pour off excess wax into a sealed container, rinse with very hot water, wipe with paper towels, and finish with a solvent if needed.
What is cheese wax?
Cheese wax is a food-grade blend of paraffin and microcrystalline waxes used to seal and protect cheeses during aging by locking in moisture and keeping out unwanted mold.
Is cheese wax edible?
No—cheese wax is food-safe but not meant to be eaten. Always peel it away before slicing or serving your cheese.
How long will cheese last in wax?
Properly waxed cheese can last 6–12+ months when stored at cool, consistent temperatures (38–55°F).
Do you remove cheese wax?
Yes—always remove the wax before serving. Gently score the edge with a knife and peel the wax away in strips.
Is cheese wax food waste?
While wax itself isn’t biodegradable, you can collect, clean, and reuse leftover wax for future batches of cheese to minimize waste.
What to do with leftover cheese wax?
Melt your wax and filter out any solid bits of cheese by straining it through cheesecloth, then let it cool and reharden. Store your saved wax in a sealed jar or wrap in cellophane so it's prepped ready for your next batch of cheese.
How do you wax a cheese?
Melt food-grade wax to about 180°F, allow it to cool slightly, then dip or brush an even coating onto fully cooled cheese. Repeat for a second coat if needed.
Is it safe to wax your own cheese?
Absolutely—as long as you use food-grade wax and follow clean, sanitary procedures.
What is the best cheese for waxing?
Semi-hard to hard cheese—think cheddar, Gouda, Colby—are ideal candidates. Explore the cheese making recipes to learn how to make cheese that can be waxed and aged.
How do you store cheese after opening wax?
Once you peel off the wax, rewrap the cheese in fresh parchment or cheese paper and store in the fridge’s vegetable drawer at 38–42°F.
Can the writer dip cheese in wax?
Yes—dipping is the most common method. Hold the cheese by a corner, dip to coat, let excess drip off, then place on a rack to fully set before a second coat.
What is the point of waxing cheese?
Wax creates an airtight seal that preserves moisture, prevents unwanted mold, and allows you to control flavor development as the cheese ages.