
This guide is filled with information on home cheese making for beginners, including general cheese making knowledge, information on supplies and basic techniques. The mission is to share the fun of…

This guide is filled with information on home cheese making for beginners, including general cheese making knowledge, information on supplies and basic techniques. The mission is to share the fun of home cheese making. If you have any questions about cheese making, simply send them to the source site.
For those looking to deepen their understanding and skills, exploring the cheese making resources can provide valuable information and connections within the cheese making community and those looking to share the joy of cheese making with friends and family, exploring the cheese making gift ideas can provide the perfect supplies and kits to inspire creativity.
Getting Started
Homemade Cheese
Most homemade cheese is made from milk, bacteria and rennet. Cheese can be made from almost any kind of milk including cow, goat, sheep, skim, whole, raw, pasteurized and powdered.
Home cheese making differs from commercial cheese making in scale and in the need to produce exact duplicate products day after day for retail markets.
Commercial cheese makers use the same ingredients as home cheese makers, but they must obtain local certifications and follow strict regulations. If you would like to sell your cheese, this guide suggests you start by making simple cheese, do as much reading as you can and visit cheese local makers in your area.
What makes each cheese so different when different tytpes of cheese use the same ingredients? At first glance, it may seem that different types of cheese are made the same way. However, the differences in cheese come from very slight variations in the process. Cheddar and Colby, for example, are very similar as they start out, but Colby has a step where water is added to the curds, causing it to a higher moisture cheese than Cheddar.
Some other factors that play a role in the final cheese include the amount of culture, ripening time, amount of rennet, size of the curds, how long and high the milk is heated, the length of time curds are stirred, and how the whey is removed. Minor changes in any of these areas can make a dramatic difference in the final cheese.
The yield of cheese from one gallon of milk is approximately one pound for the hard cheese and two pounds for the soft cheese.
The amount of butterfat in the milk will affect this. Sheep milk for example, is 9% butterfat, so the yield will be much higher than Goat or Cow milk.
Yes, you can double, triple or even cut a recipe in half. Simply increase or decrease the amount of culture and rennet proportionately. The times and temperatures should be close to what the recipes call for.
Brining time is simply a matter of scale, increase proportionate to cheese volume.
As in life, nothing works perfectly, so you may need to adjust a recipe slightly. This guide recommends keeping good notes so you can look back to see what worked well and what did not.
You can smoke homemade cheese using a cold smoking process. The smoke is usually generated in a separate chamber, then cooled before entering a box containing the cheese. On the industrial level, cheese is smoked at 40-50F. At home, it must be kept below 84F, or the butterfat will melt and run out.
No changes are need at high altitudes, because there is nothing to boil in the recipe.
Yes, you can make cheese with little or no refridgeration. If youre interested in exploring different types of cheese, you might also want to try making vegan cheese, which offers a delightful alternative using plant-based ingredients. This can be a great way to experiment with new flavors and textures while enjoying the cheese-making process. Cheese has been made for centuries in every corner of the globe. If you have limited refrigeration, this guide suggests you make fresh cheese, most specifically, a Mediterranean or Central and South American style cheese. They depend on high acid and/or salt for preservation and are consumed quickly. This type of cheese includes Mozzarella, Feta, Paneer, Queso Fresco and Queso Blanco.
Unfortunately, it is hard to make homemade whey protein from cheese making. Even larger cheese makers cannot justify the energy needed to dehydrate the whey. Primarily, it is done by large operations that consolidate whey from many large plants.
30 Minute Mozzarella & Ricotta Kit
Ricki's Basic Cheese Making Kit
30 Minute Mozzarella & Ricotta Kit
Ricki's Basic Cheese Making Kit
Supplies
Cheese Making Supplies
When buying cheese making supplies it is a good idea to find a Cheese Making Recipe first, then start making a list of the ingredients and equipment you will need to make your cheese.
Chlorinated water will prevent the enzyme action of rennet. If you do not know your tap water is non-chlorinated, call your local water department. If it is chlorinated, you can use distilled water, spring water, or filter your tap water. Most filters remove 97% of the chlorine from water, which is enough for cheese making.
Some types of fresh, soft cheese including Fromage Blanc, Mascarpone and 30 Minute Mozzarella can be made without adding salt.
Hard cheese and mold-ripened cheese require salt. It is used not just for flavor, but to slow the bacteria down and prevent an overly acidic cheese. Most cheese have about 1-1.5% salt by weight.
Iodized salt will interfere with bacterial ripening, so this guide suggests using one that is non-iodized. Most canning salts will work for making a brine soloution.
One of the biggest differences between the Cheese Salt and regular salt is the larger crystal size. When dry salting, the flake size of Cheese Salt ensures it does not dissolve too rapidly.
All of the cultures and supplies can be used with goat, sheep or cow milk. The same is true for the Cheese Making Recipes. Some types of cheese are traditionally made with goat milk, so this guide has put them in a separate section of the book Home Cheese Making.
This guide has been shipping cheese making supplies world wide for over 40 years. This guide has tested the cultures by storing them at room temperature for up to two months with no potency loss. This is comparable to two or three weeks in a warmer climate, and they will survive. However, if you are shipping to a very hot climate, it is always safest to select a faster shipping option.
The large, open weave cloth found in many grocery stores will not work for cheese making. This cloth is not woven tight enough, when draining cheese you could lose it all through the loose weave.
The Butter Muslin this guide cary is finely woven and will properly drain your soft cheese without letting it going down the drain.
The Cheesecloth is used to line cheese molds and to drain curds when making hard cheese making.
Since the cheese making process happens at temperatures similar to the healthy body temperatures, a good quality medical thermometer can be used to calibrate your thermometer.
- Run warm water between 88-98F into a container deep enough to immerse both thermometers.
- Place thermometers in the water, check temperature readings once they have stabilized.
- If your new thermometer is not reading at the same temp as the medical thermometer, locate the nut found under the dial head.
- Using a wrench, turn the nut clockwise or counterclockwise as needed until the needle reads the same temperature as the medical thermometer.
- Repeat this process as needed.
Goats Produce Too!
Butter Muslin
Tel-Tru Thermometer
Goats Produce Too!
Butter Muslin
Tel-Tru Thermometer
Techniques
Cheese Making Techniques
Here are a few tips and tricks along with information on specific techniques. When starting out remember, people have been making cheese for thousands of years, the process can truly be as simple or as scientific as you would like.
Cheese making uses specific bacterial cultures to ripen milk. To avoid contamination by unwanted bacteria, it is important to keep all equipment and surfaces clean and sanitized.
How to sanitize cheese making equipment and surfaces
Surface Areas
This guide recommends using a food grade sanitizer. Before you begin making cheese, wipe down and dry your counters.
Utensils
Sterilize utensils in boiling water for 10 minutes, or run them through the dishwasher on a sanitize cycle.
Pots
Sterilize pots with boiling water for 10 minutes, or run them through the dishwasher on a sanitize cycle.
After many batches of cheese, a residue can build up on your pot called milk stone. The best remove this is with an acid based detergent for dairy use. Normally, alkaline based dairy cleaners are used to remove fat and proteins, but calcium deposits of milk stone need an acid based cleaner. Most dairies use the alkaline cleaner every day and acid cleaner once a week.
Cheesecloth or Butter Muslin
Before first using, it is best to hand wash your cheesecloth in cold water with a neutral detergent to get out all the sizing and process debris. Always rinse your cheesecloth or butter muslin in cold water immediately after removing your curds/cheese. This will prevent the milk proteins from bonding to your cloth. After you have rinsed in cold water, you may proceed to hand or machine wash your cloth in warm/hot water with a neutral detergent.
How to maintain temperatures when heating milk
The easiest way to keep a pot of milk at the correct temperature for long periods of time is to place it in a skitchen sink filled with hot water. As the milk heats to the correct temperature, the water bath begins to cool. When needed, drain some water from the sink and add boiling water, to raise the temperature. When starting the process, you want the water in the sink to be about 10-15F hotter than your target milk temperature. As you get within 7-8 degrees of your target, reduce the water temperature to 2-3 degrees above the milk target temperature.
How to raise the temperature 2 degrees every 5 minutes
Temperature control can be tricky to figure out in the beginning. To increase the temperature slowly, add boiling water to the water bath so it stays 5-10 degrees warmer than the milk temperature. When cooking curds, slow heating is only needed for the first 10-15 minutes. Once the curds have released a good deal of whey, you can heat much faster.
How to know when curd is ready to be cut
Poke your finger into the curd at a 45 degree angle, if the curd breaks neatly around your finger, the curd is ready to be cut.
What do the writer do if the curd is not ready to cut
Wait five minutes, then try again.
Do not wait to cut the curd once it is ready
The curd needs to be cut when it is ready, otherwise it will continue to firm and will not drain the whey properly.
What to use when cutting cheese curds
You can use a Curd Knife, with a blunt end to cut cheese curds. Or, a long bladed knife, but be gentle, so it does not scratch the bottom of the pot.
Why do curds get cut when making cheese
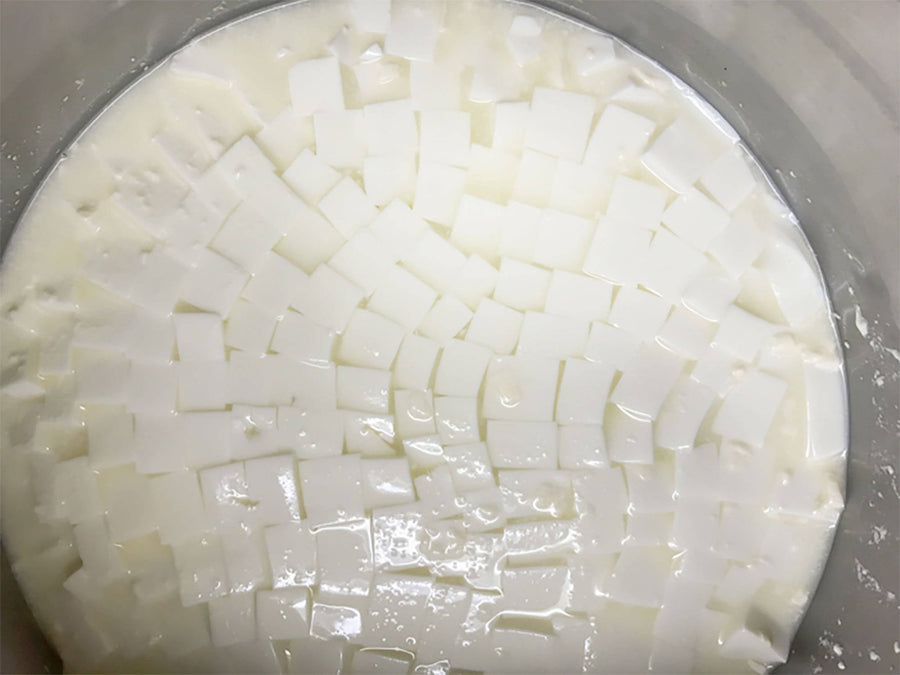
Cutting curds increases the surface area, this allows the curd to properly expell whey. The size of the cut determines how fast and how much whey the curds drain.
Different cheese making recipes call for different sized cuts including 1/4", 1/2", 3/4" and 1" cubes.
You do not have to check pH oracidity when making cheese
For thousands of years cheese was made without taking any scientific measurements. However, in the past, cheese makers were handed down recipes from previous generations and the same types of cheese were made year after year. Today, it is a little harder to instinctively know what is going on with your milk.
Why it is helpful to measure pH and acidity when making cheese
The cheese making process is largely a matter of acid development. Measuring the initial acid in milk to make sure it has not developed too much acidity and monitoring the rate of acid development during the cheese making process is a good idea.
Most types of cheese have a target acid development profile that defines its style. That is why acid monitoring during the cheese making process can help. This can be done by checking the Titratable Acidity (TA%) or the pH value.
Measuring pH is easier for home cheese making, because it yields results that are consistent from batch to batch.
For more information, check out the article on Acid Testing. The book, American Farmstead Cheese by Paul Kindstedt also goes into detail on acid and pH measurements for different types of cheese.
The best way to test pH and acidity levels when making cheese
pH Strips are far and beyond the easiest way to check pH values when making cheese at home. Another option for testing pH levels is a pH Meter, these can be slightly more accurate than testing strips, but require re-calibration before each use.
For testing titratable acidity, the Acid Testing Kit is a great choice. It is easy to use and includes all of the ingredients and supplies needed to test acidity levels.